-Spray paint (I used Plasti-kote Fast Dry enamel in Sky Blue
& Hot Pink from B&Q)
-Plastic toys – new or discarded!
-Strong adhesive (Araldite works best)
-Plastic carrier bags – cheap thin ones are the most suitable
-Protective sheeting or newspaper
-Good ventilation!
-Apron to protect clothing
1. Eat lots of delicious jam or chutney.
2. Soak empty jars in hot soapy water to remove labels. Use
nivea and a J cloth to remove the sticky residue (tip from my grandma!). If you
do not remove the stickiness you will be left with a rough surface when you
apply the spray paint.
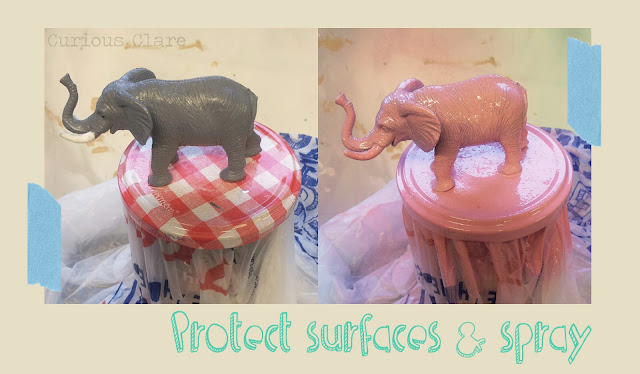
3. Glue plastic toy to the jam jar lid using a strong adhesive
such as araldite.
4. When dry, put a plastic carrier bag over the glass part
of the jam jar and screw the lid shut.
5. Put on an apron and cover your work surface with
newspaper or protective sheeting.
6. In a well ventilated area, spray the lid with an even
layer of spray paint. You may need to apply several coats to larger toys. It is
advisable to wait for each layer to dry before applying new coats of spray
paint.
7. When the lid is completely dry remove the plastic carrier
bag and fill. I filled mine with ribbon and wires that were cluttering up a
drawer.
8. Screw on lid and admire your handiwork!
 |
| Wedding photography by Kelly Clarke of Imagesplash |


This was a good suggestion that you put up here...dude…..hope that it benefits all the ones who land up here.
ReplyDeleteHong Kong Tutor
I love the wedding favour mini jar vase idea!!
ReplyDelete